How to accept external file uploads using File Drop
This guide provides steps for a user to securely share a folder within Nextcloud to accept file uploads from an external user.
- Login to NLPL's Nextcloud website (https://drive.nlpl.ca) with your NLPL email username and password.
- Create a folder for external uploads. You can name it whatever you choose, but a good folder name would be external uploads.
- Next, click your newly created folder, and look for the sharing tools found on the right side of the screen. Click the "+" icon on the right side of Share Link.
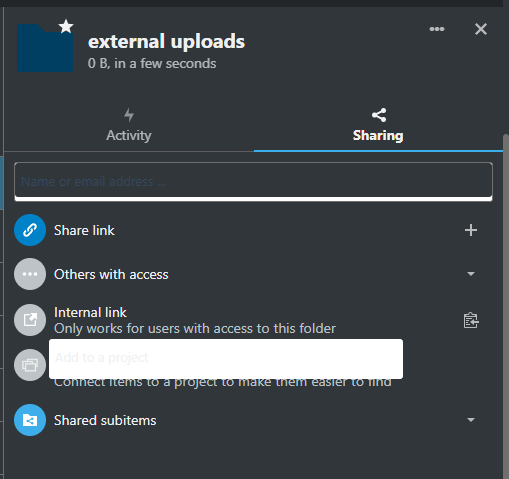
4. Now that your folder is shared you need to set the share permissions and enable the upload feature. Click the three dots to the right of Share Link, and a menu will appear.
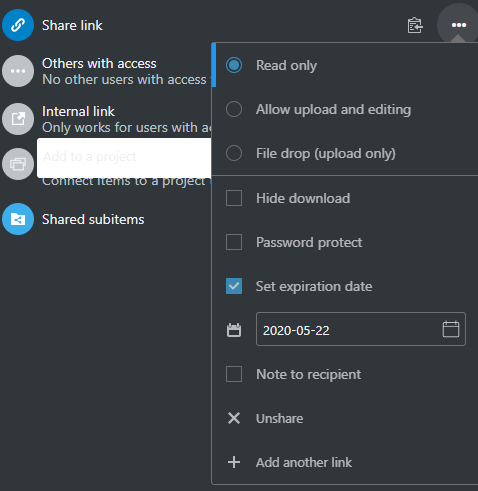
Password Protect (requires external contact to enter a password set by you before they can upload).
Set Expiration Date (set the date your share link will stop working), default is one week, the expiration date is not required to be set.
Note to the recipient: add a note to be displayed on the file upload page for your external contact(s).
Unshare the folder: the folder is no longer accessible to external users
There is no save button to click after you have made your selection, changes are saved in real-time.
6. To send the link to an external contact(s) click on the copy to clipboard icon found to the right of Share link.
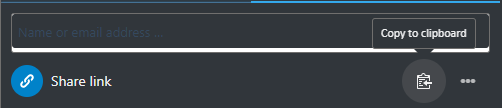
The public accessible link has been copied to your computer's clipboard. Go to your email and compose a new email, past the link in the body of your email.
Your external contact can now securely upload files to your folder.