Checkin
This section explains how to checkin items and how to perform some simple item status editing.
![]() Printable Quick Guide: Checkin
Printable Quick Guide: Checkin
Checking in an Item
You need to be in the Checkin window to check items in:
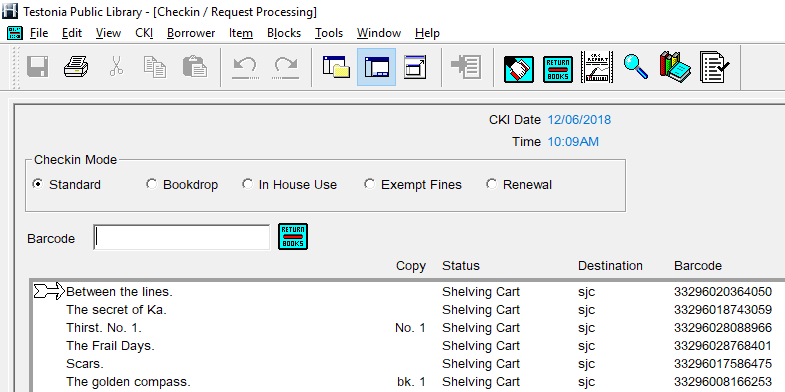
To check in an item, scan its barcode. The barcode will appear in the Barcode field and the item will be added to the top of the list of checked in items, as shown in the pane above.
If the item does not scan, click inside the Barcode field and try again.
You can also type in a barcode into the barcode field.
You do not need to use a borrower’s library card to perform check in.
Item Status
When an item is scanned into the Checkin window, its status gets updated. The status is shown next to the item’s name in the list.
By default, the status is changed to ‘Shelving Cart’. This will automatically update to ‘Checked In’ after a short time.
If an item needs to be held for another borrower, Horizon will prompt you with a pop-up message and the status will change to ‘Being Held’.
If an item belongs to another library, Horizon will prompt you to place it in transit and the status will change to ‘In Transit’.
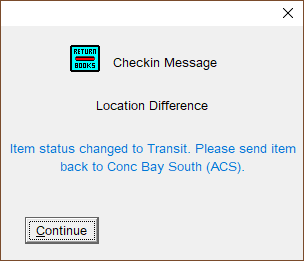
In general, checking in an item is a good way to determine where it belongs. If it was already checked in, Horizon will tell you and it can be shelved. If it needs to be held or mailed, Horizon will tell you who to hold it for or where to mail it.
Checkin Modes

Standard
The default setting. It will checkin items at the current date and time, automatically assessing fines and activating hold and transit requests.
Always return the checkin to Standard mode when you have finished a task using one of the other modes.
Bookdrop
This mode resets the checkin date to the last open day that the library was open, and the time to one minute before closing time on that day.
Use this option for items left in your site’s bookdrop, if it has one.
In-House Use
This mode allows you to record in-house use of an item. For example, if a patron reads a book within the library without checking it out.
Exempt Fines
Select this mode to avoid charging fines for overdue items. For example, if a borrower was unable to return their items on time due to a hospital stay.
Renewal
This mode allows you to renew an item that is present for a borrower. Horizon will ask you to confirm whether or not the item is present, and if there are no requests for the item, then it will be renewed, with the new date shown in the checkin list.
Renewing items in the Checkin window is quick, but it is usually better to renew items from the Checkout window.
Why? Renewing from checkout allows you to see all items that a borrower currently has checked out, potentially spotting other items that might need renewing or are overdue. Using the checkout will also automatically make you and the borrower aware of any blocks on their account.
Checkin Display Options
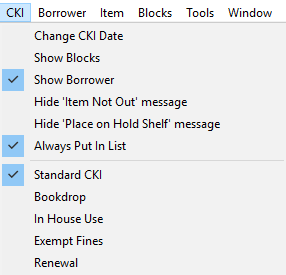
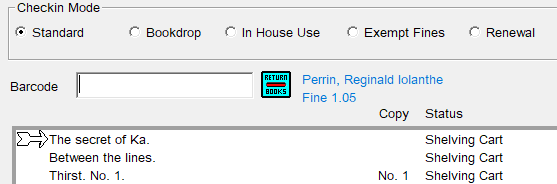
Show Borrower
If selected, then the name of the returning borrower will display as each item is checked in. Any fines incurred for the item will show too.
Always Put in List
Always keep this selected!
This option makes sure that items are listed in the Checkin window as they are checked in. This allows you to see if you missed checking in a title. You can also select a title from the list to edit it if needed.
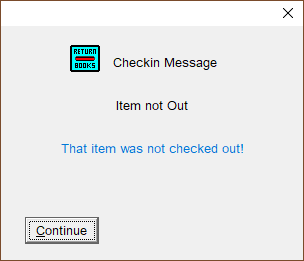
Hide 'Item Not Out' Message
If this option is not selected then whenever you check in an item that was already checked in, a pop-up message will appear. Selecting this option skips the message.
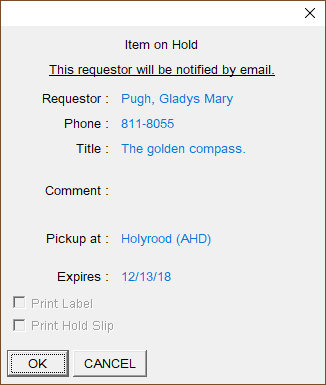
Hide 'Place on Hold Shelf' Message
Never select!
We need to see the pop-up message that tells is when an item needs to be set aside:
Checkin Buttons

OK
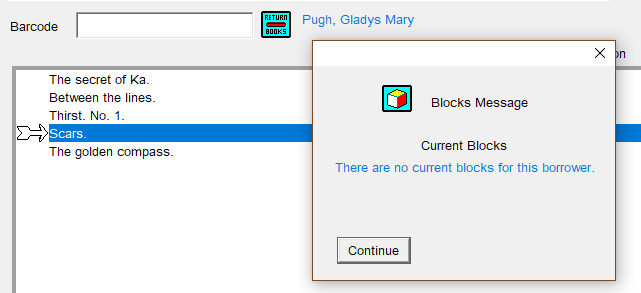
Show Blocks
After checking in returned items we might want to go to the borrower's blocks so that, for example, fines can be paid.
Select an item in the Checkin window and then click on Show Blocks to see the current blocks for the borrower who returned the item.
See the section Blocks and Fines for how to take payment for fines.
Change CKI Date
The checkin date can be dialed back to a previous day if, for example, the library was closed unexpectedly for a snowstorm, preventing borrowers from returning items on time.
Usually you should not need to change the checkin date following a closure.
If your library has to be closed for any reason, you should contact your regional manager. They will contact headquarters who will adjust the library’s hours in Horizon, preventing borrowers from incurring fines due to closure.
Edit Item
This allows you to edit items listed in the Checkin window. It can be useful for tasks such as changing the status of an item, for example from 'checked in' to 'discarded'. See the section Editing Items from Checkin.
Clear
This clears the list of checked in items.
Editing Items from Checkin
To edit items from checkin:
-
-
- check in the item(s)
- select the item(s)
- click on Edit Item
- the Edit Window will open
-
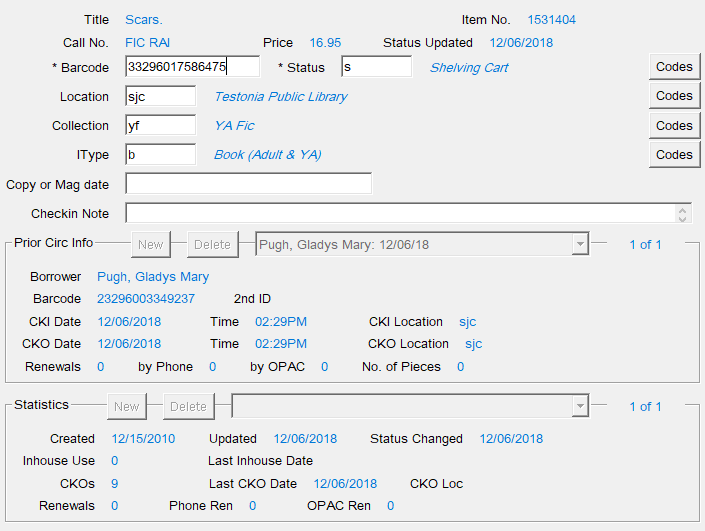
Single Item
Several fields can be edited. Where codes are required, you can click on the Codes buttons to see full lists of valid codes.
Previous borrower details and usage statistics are also shown.
All Items
To select all items in the Checkin window, press the [Ctrl] + [A] keys or select from top menu Edit > Select All.
Horizon does not allow you to select specific items from the checkin list, so you may need to Clear the Checkin window before scanning the items that you intend to edit.
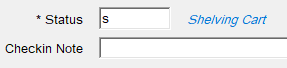
Clicking on Edit Item will bring up the Batch change Message:
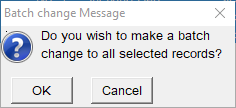
Click on OK and you will be able to edit the item's status or add a checkin note:
Items Without Barcodes
Items without barcodes can be sent to the checkin list. To do this:
|
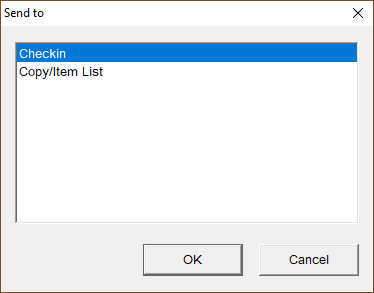 |

From here you can edit the item.
This is a good way to discard items from the catalogue if they are not present.
For items with barcodes, it is better to use the Item Group Editor.