Reports
This section explains how to generate and send the daily notices that remind borrowers about overdue, almost-due, or lost items, and how to run the reports that tell you which items need to be put on hold, sent elsewhere, or re-shelved. It also explains how to use the Item Report and Adhoc Stats features to help manage your collection.
Circulation Reports
| The Circulation Reports window is opened by clicking on its button: | 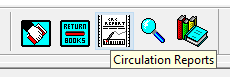 |
The window opens separate from the rest of Horizon, so you can still access circulation functions while reports are being generated and output.
Circulation Notices
![]() Printable Quick Guide: Circulation Notices
Printable Quick Guide: Circulation Notices
Circulation Notices must be run daily.
Running notices is a 2-step process: they have to be generated and then outputted. There are 2 batches to run, Auto Notices and Pre-Overdue Notices.
Auto Notices will send reminder emails to borrowers with overdue items, tell borrowers about items being held, and print letters for borrowers with lost items.
Pre-Overdue Notices will send reminder emails to borrowers 4 days before items are due back.
Emails about overdue and held items will only be sent to borrowers who have an email address record in their borrower record.
Pre-overdue reminder emails will only be sent to borrowers who also have the PreOverdue option selected in their record:

You can check this by going into the borrower’s record from the checkout window:
-
-
- search for the borrower or scan their card
- press [F6]
-
To begin generating the notices:
-
-
- open Circulation Reports
- select from top menu Notices > Notice Output
-
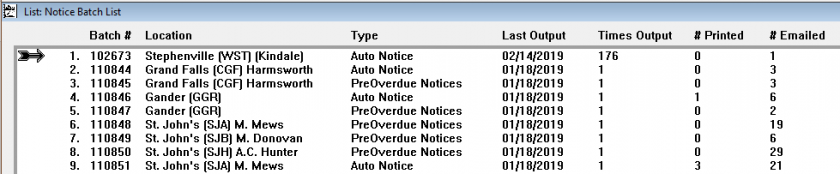
The Notice Batch List opens. It lists all the notices that have been recently generated across the province. The notices that you are about to generate will appear at the bottom of this list.
|
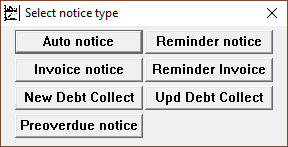
To generate the Auto Notices:
|
 |
If there are no notices to generate then Horizon will tell you. That often happens at smaller sites.
Generate the Preoverdue Notices in a similar way:
|
When both sets of notices have been generated scroll to the bottom of the list. The quickest way is to press [Ctrl] + [End] on your keyboard.
Select the notices for your location, making sure that the last output date is blank:
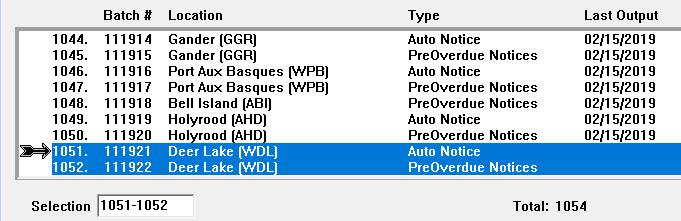
If the date is not blank it means that someone else has already output the notices for your site. Don’t output them again.
Click on Output to email and print the notices. If you don’t do this then messages will not be sent.
Emails will be automatically sent. If any emails cannot be sent then an error message will appear, and you will need to submit a support ticket to IT. See the section on Troubleshooting.
If any letters have been printed for lost items, check the shelves for the items before mailing.
If the Printer Jams and Notices are Lost
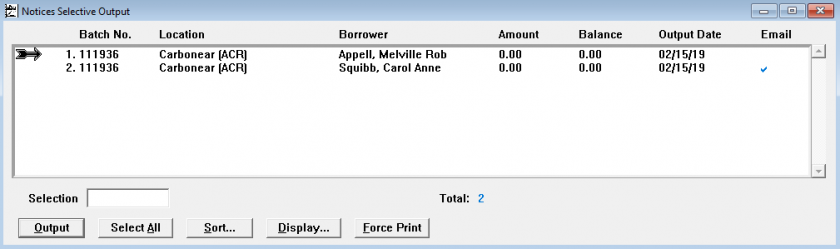
Notices can be reprinted:
-
-
- highlight the Auto Notices for today for your location
- if you are coming back later to do this make sure to choose the correct date
- click on Select
- a list of borrowers who should have received notices appears
- notices sent by email have a blue tick in the email column
- highlight the notices to be reprinted
- click on Output to print
- highlight the Auto Notices for today for your location
-
Request Pull List
![]() Printable Quick Guide: Requests and Holds
Printable Quick Guide: Requests and Holds
The Pull List is the list of all items that need to be fetched from the shelves and put on hold for borrowers or sent to other locations. Scan the items into the checkin and Horizon will tell you what to do.
The pull list must be requested daily, and at smaller sites it may often be empty.
To request the pull list:
-
-
- open Circulation Reports
- select from top menu Requests > Request Pull List
- this message will appear:
-
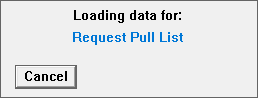
It can take some time before the list is generated, but while that’s happening you can go back into Horizon and use other circulation functions if need be.
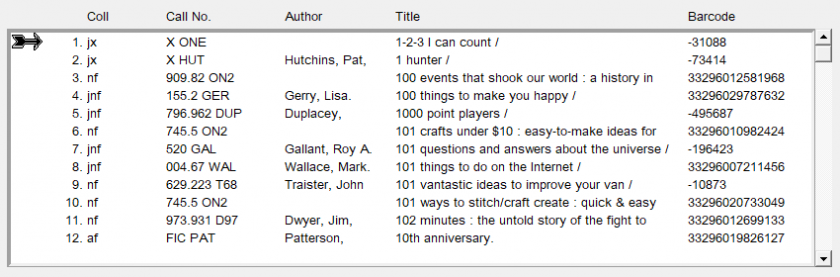
You will need to print the list and go find the items on the shelves. However when first generated it provides too much information about each item to print tidily:
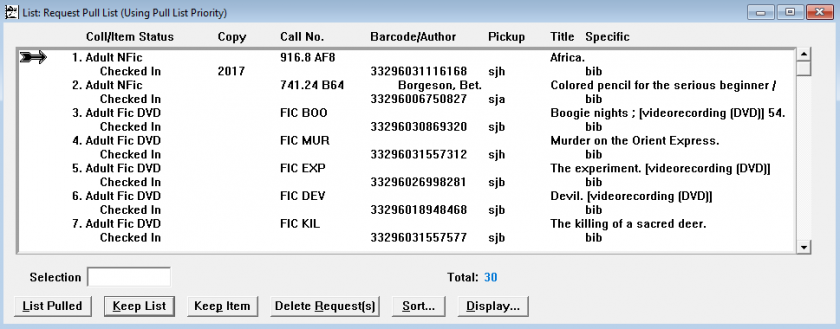
|
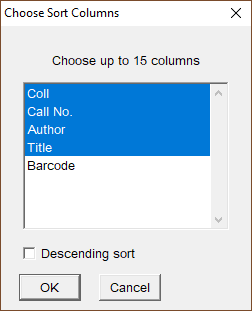
So click on Display and choose these four columns:
If your site holds multiple copies of items then you will need to select Barcode too. |
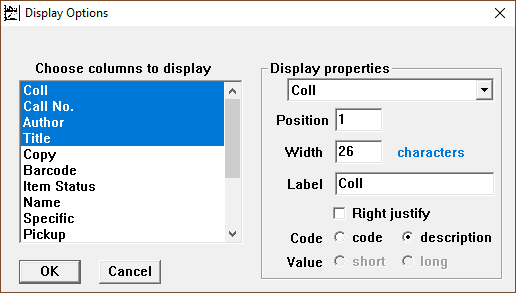 |
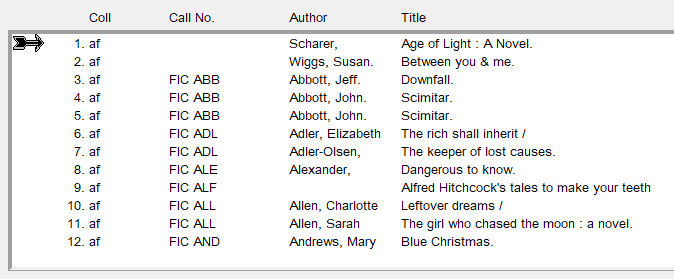
Click on OK and the list will look a lot tidier, and can now be printed with one item per line:
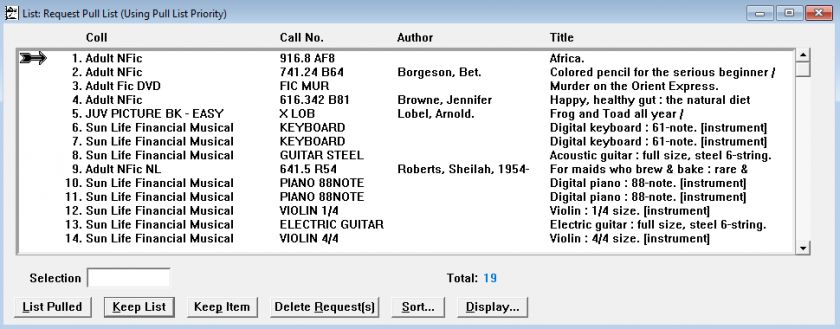
When you have printed the list click on Keep List. This will make sure that items keep appearing in the list until you have found them and checked them in.
Click on Yes when this pop-up appears:

Never click on List Pulled. This will delete everything from from the list for the next 24 hours.
Never click on Delete Request(s). This will cancel all the requests made by borrowers. If you need to delete a request for a borrower, do that from the Borrower’s Request List. See the section Requests and Holds.
When you have found the items check them in. Horizon will tell you who to place each item on hold for.
If you cannot find an item in the list, then after a few days you will need to change its status to trace. See the section Adding and Editing items.
Expired and Cancelled Holds
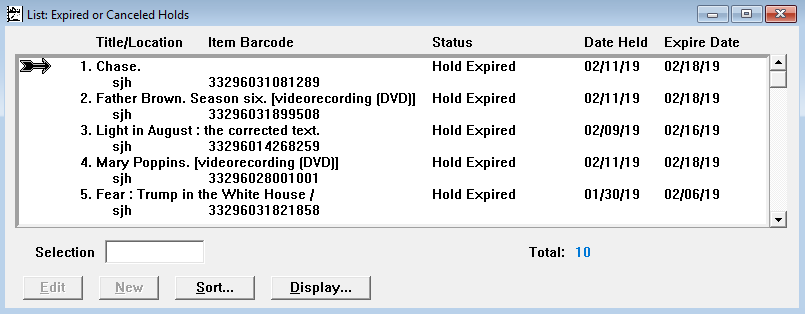
The Expired and Cancelled Holds Report provides a list of items being held that the borrowers have not picked up on time. The items need to be removed from the holds shelf and checked in. Horizon will then tell you if the item needs to be held for another borrower, placed in transit, or re-shelved.
This report must be generated daily, and at smaller sites it may often be empty.
To generate the report:
-
-
- open Circulation Reports
- select from top menu Requests > Expired/Canceled
-
Remove the items from the holds shelf and check them in. If an item cannot be found on the holds shelf then check the regular shelving. If an item is not there either then you will need to set its status to trace using the Item Status Editor. See the section Adding and Editing items.
I didn’t have time to run my notices today!
Generate and output them as soon as you can. Horizon will generate all notices that should have been sent since you last ran notices.
Be aware that running notices late gives borrowers less notice about items that are almost due back and items that are being held for them.
Online Stats
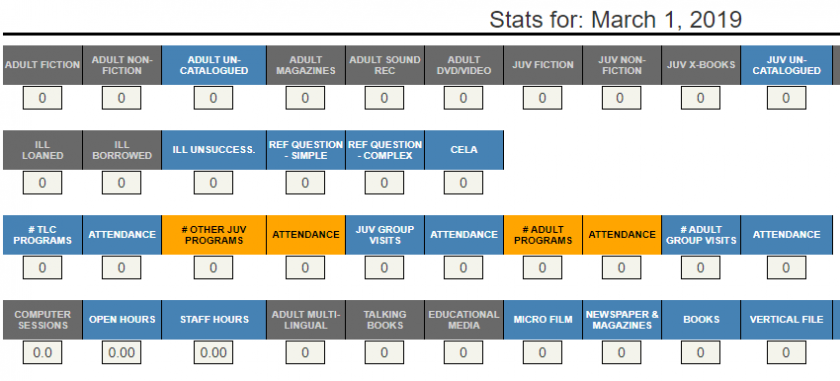
Every day you need to submit circulation and activity statistics for your site.
This is done through the Library Stats System. Some of the stats are automatically completed by Horizon, and they appear in gray. Some stats have to be completed manually, and they appear in blue or yellow:
Item Report
Item Report is useful for managing your collections. You ask it to search for items in a particular collection, status, and location and it will return a list of results.
As examples, it can provide lists of all items that:
-
-
- are currently checked out
- have not been checked out in the last 4 years (or any other time period)
- are in the Adult Fiction NL collection
- need to be traced
- are on order for your location
-
You can compound the search, meaning that you can ask it to search based on 2 or more conditions.
For example, a search for ‘items that need to be traced from the DVD location at Bay Roberts’ will use 3 conditions:
|
status is ‘trace’
AND
item type is ‘dvd’
AND
location is ‘abr’ |
See Compound Search for how to do this.
You can print the list of results, and you can also sort the list by collection and call number, which will help when you are searching the shelves for items.
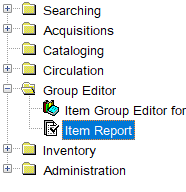
| Item Report is opened by clicking on |
|
|
Double-click on it to open the compound search box:
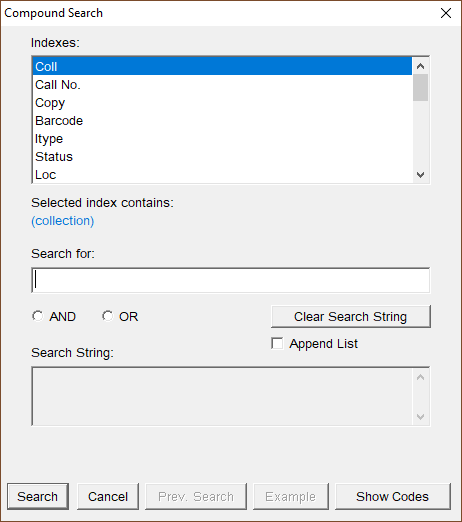
Select an index in the top half of the box and then type in the code for it in the ‘Search for’ field. Click on Search to see the list of results.
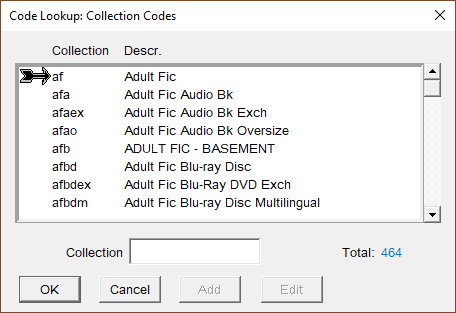
If you don’t know what code to use then click on Show Codes:
Simple example: find all items belonging to a location
To find all items belonging to Trepassey (ATY):
-
-
- select the index 'Loc'
- in the Search for field, enter the code ‘aty’
-
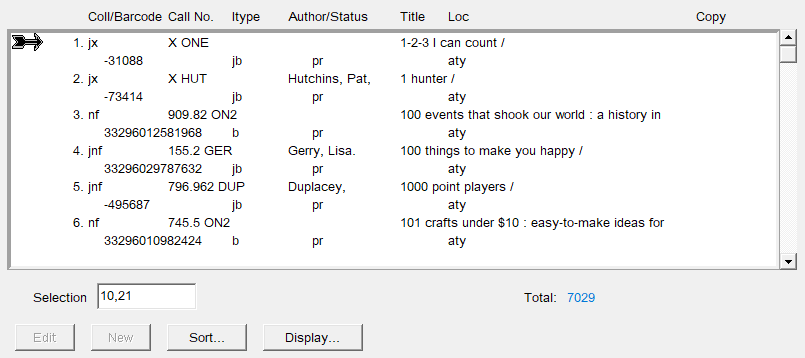
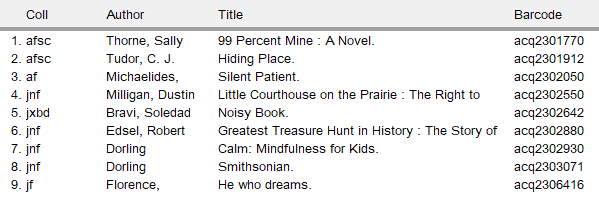
These are the results:
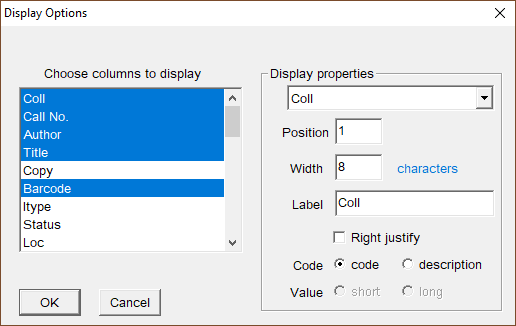
Clicking on Display lets you choose which information to display for each item, which is useful if you need to print the list.
Keep the columns highlighted that you want to display:
The list is now clearer to read:
It can also help to sort the list, by collection and into alphabetical order. Click on Display and choose what to order by:
…and the list is now sorted, and good to print:
Compound Search
To search using more than one condition you need to:
-
-
- select the first index to search
- enter the first condition
- select AND or OR
- select the second index to search
- enter the second condition, and so on
-
Compound Example: find items on order for your location
|
|
 |
…and here are the results:
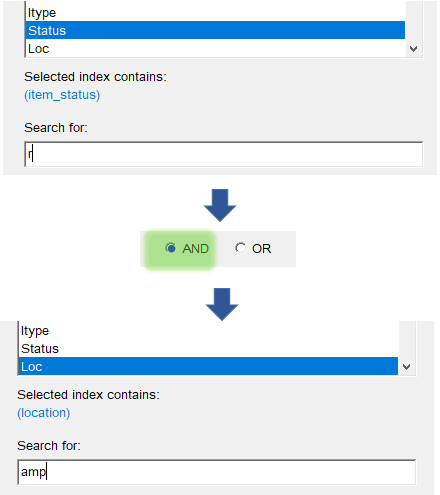
Compound Example: listing items needing to be traced at your location
-
-
- select the index Status
- enter ‘trace’ into the Search for field
- select AND
- select the index Loc
- enter the 3 letter code for your location (for example 'amp' for Mount Pearl)
- click on Search
-
Cancelling a Search
If you decide to cancel a search this pop-up message will appear:
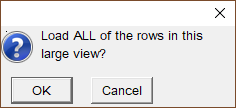
Click on Cancel, otherwise Horizon will try to fetch the entire database of items.
Press [Esc] to close the Item Report window.
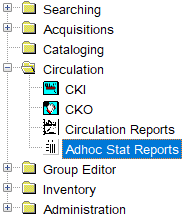
Adhoc Stat Reports
Horizon can generate detailed reports, such as a breakdown of how many items are in each collection at a site, or how much revenue was taken in lost and late fees over a chosen period.
These reports are generated by the Adhoc Stats Report feature found in the navigation bar:
Double-click on Adhoc Stats Reports to open the generator box. Select:
-
-
- the type of report
- one or more locations to generate it for
- if you have chosen a daily report then also enter a date in the Date field
-
If you are not working at Bell Island then deselect that location before selecting your site

In the example above the monthly Collection Snapshot report is going to be generated for Bay Roberts (ABR).
Click on Save to File if you want to keep the report.
To open the saved file use Wordpad or Notepad because both programs retain the column formatting.
A monthly collection snapshot looks like this:
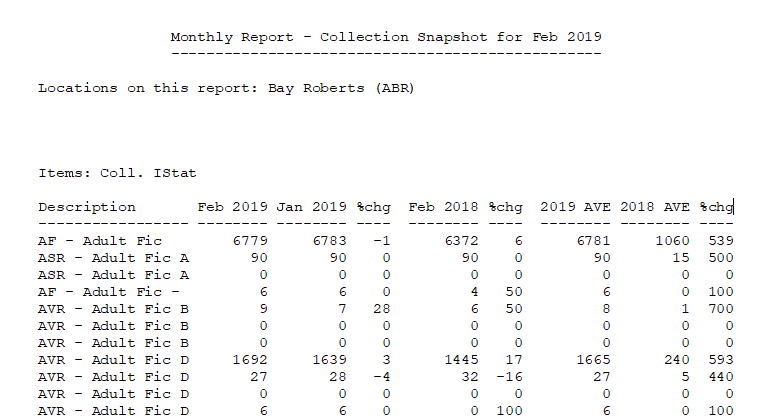
The report can run to several pages and provides a comprehensive breakdown of how many items are in each collection, as well as how many items were in the collections 1 month ago and 1 year ago.
The descriptions are truncated, so some can be slightly cryptic – for example in ‘Adult Fiction A’, the ‘A’ is for ‘Audio’. Similarly ‘B’ is for ‘Blu-Ray’, ‘D’ is for ‘DVD’ and so on.
Also, be aware that the report lists how many items per collection Horizon has recorded for your site.
This can differ from reality if weeded books were not discarded in Horizon, or if books have gone missing without staff being aware.
The Item Report feature can be used to list exactly which items Horizon has recorded for the collections at your location.